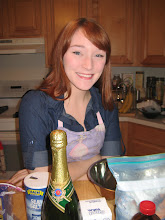
For the aforementioned picnic, I also wanted to make dessert that was springy and delicious and easy to eat/clean up! And I thought, what is more light and fluffy and springtime-y than angel food? What a heavenly recipe...
Heavenly Angel Food Cupcakes
Ingredients
12 eggs
1 1/4 cups confectioners' sugar
1 cup all-purpose flour
1 1/2 teaspoons cream of tartar
1 1/2 teaspoons vanilla extract
1/2 teaspoon almond extract
1/4 teaspoon salt 1 cup sugar
Directions
Separate eggs; discard yolks or refrigerate for another use. Measure egg whites, adding or removing whites as needed to equal 1-1/2 cups. Place in a mixing bowl; let stand at room temperature for 30 minutes.
Meanwhile, sift confectioners' sugar and flour together three times; set aside. Add cream of tartar, extracts and salt to egg whites; beat on high speed. Gradually add sugar, beating until sugar is dissolved and stiff peaks form. Fold in flour mixture, 1/4 cup at a time. Gently spoon into an ungreased 10-in. tube pan. Cut through batter with a knife to remove air pockets. Bake at 350 degrees F for 40-45 minutes or until cake springs back when lightly touched. Immediately invert pan; cool completely before removing cake from pan.
Strawberry Cream Cheese Frosting
Ingredients
•One batch angel food cupcakes.
•1 to 2 pounds of strawberries, cleaned and hulled.
•1/4 cup of confectioners sugar
•1 8oz. pkg. of cream cheese, softened
•1 12oz. container of cool whip
•1 tsp. of vanilla
Directions
1.Slice 1 cup of strawberries and add confectioners sugar. Mix well. Let stand at least a half hour to let berries "juice." Mash well after that time.
2.Cream softened cream cheese with mixer and add vanilla.
3.Add strawberry mixture and mix well on low speed. Last, fold in cool whip and mix well.
4.Frost Angel food cake putting excess frosting in the center hole of the cake.
5.Slice remaining strawberries and cover cake with the slices. If strawberries are small to medium in size they can be halved to cover the cake. You will need more than a pound to do it that way, but it makes for a prettier cake.
6.Chill for at least 1 hour.
**Hannah's Hints**
* This is actually a recipe for angel food cake, so the cupcakes end up smaller and more dense...almost like a little tea cake. It's so interesting and reaaaaaally good!
* The frosting recipe is fluffy and divine...you WILL love it.
* I made pretty little strawberry fans which I learned how to make at my roommate's Pampered Chef wedding shower...pretty adorable! This is another cupcake you will not be able to put down!
* There is absolutely no reason to use 12 eggs... separate the whites into a liquid measuring cup, and you probably won't use 12 eggs!
Friday, April 30, 2010
Week 15. Picnic Perfect Macaroni and Cheese Cupcakes
Carly, Caleb, my wonderful boy, Hanzy, SMB and his friend, and I all had a picnic a couple weeks ago! I wanted to make something delicious, but easy to eat at a picnic! Now, Macaroni and Cheese cupcakes sound pretty gross...but they are an amazing savory cupcake!
Mac & Cheese Cupcakes
Yield: Makes 24 cupcakes
8 ounces small elbow macaroni
Olive oil
1 1/2 cups whole milk
2 tablespoons cornstarch
1 teaspoon Dijon mustard
1/2 teaspoon freshly ground black pepper
Salt to taste
2 cups sharp cheddar
Butter
Seasoned bread crumbs
2 tablespoons chives, snipped
1. Preheat oven to 350°F.
2. Cook the macaroni until tender. Drain, toss with a little bit of the oil, and set aside.
3. In a medium nonstick saucepan, whisk together the milk and cornstarch until well blended. Stirring often, bring to a boil over medium heat.
4. Stir in the mustard, pepper, and salt. Reduce heat to low and simmer until thickened.
5. Stir in the cheddar until it melts, then fold in the macaroni.
6. Butter two cupcake pans and coat with the bread crumbs. (Be sure to shake off the excess.)
7. Fold the chives into the macaroni mixture. Spoon the mixture into the pans and top with bread crumbs to taste.
8. Bake until golden on top, 15 to 25 minutes.
**Hannah's Hints**
* Make sure you butter the cupcake pans completely...it's scary not to use cupcake papers, but TRUST me... if you fully butter and bread crumb them, they'll slide out as easily as if you did! Easy peasy lemon squeezy!
* When you cook the macaroni, make a decision. The directions on the box will give you al dente noodles...I care for mine mooshier!
* Don't be discouraged if you put the cheese sauce on the macaroni and it doesn't taste like yummy mac and cheese...when you add the chives, bread crumbs and bake them the taste all comes together...DEElish!
* You won't be able to stop eating these...definitely share!
Saturday, April 17, 2010
I get a grin...
Thursday, April 15, 2010
Things I'm ADORING this week...
I have been having a very busy week filled with doing absolutely nothing...thus, I have found many beautiful things in my life.
I made this necklace for the Red Queen for Spring Into Dance!
These beautiful, gracious women...I aspire to be a mixture of them.
Mary Pickford was my celebrity look-a-like for Makeup class...I have come to adore her.
Beatiful girl.
Isn't this lovely? Glow in the dark things are the BEST!
Edward Gorey is one of my very favorite illustrators. I adore the macabre beauty!
Smart man, that Gandhi... One of my mottos.
I want to live here. Forever and ever.
In a fit of frustration with school, I went to the $5 sale at Urban Outfitters and bought this. Yessss.
I watched Stepford Wives for the first time the other day...I loved it because I love the idea and the clothing! But also terrified because I feel if I ever go nuts, I'll turn into the Glenn Close character!
***
And finally...
***
My beautiful, amazing, mint green bicycle!! (Which I hope to pick up sometime next week!)
So much happiness and love, despite craziness at school! And my birthday is in a week! YAY!
most pictures from weheartit
Monday, April 12, 2010
Week 14. "Happy Birthday, Daddy!" White Chocolate Raspberry Cupcakes
April 8th was my wonderful Daddy's birthday, so I wanted to make a cupcake in honor of him! I know he loves white chocolate and raspberries and this classy-sounding recipe seemed like the perfect fit!
"Happy Birthday, Daddy!" White Chocolate Raspberry Cupcakes
Makes 12 cupcakes.
Cupcakes:
1 1/4 cups all-purpose flour
1 teaspoon baking powder
1/4 teaspoon baking soda
1/2 teaspoon salt
1/2 cup granulated sugar
1/4 cup brown sugar, packed
4 ounces white chocolate, melted
1/3 cup oil
1/2 cup soy milk
1/2 cup coconut milk
2 teaspoons vanilla extract
1/2 teaspoon finely grated lemon zest
Filling:
8 ounces frozen raspberries
1 tablespoon water
3 tablespoons sugar
1 teaspoon lemon juice
1 tablespoon cornstarch mixed with 1/4 cup water
Frosting:
1/2 cup butter or margarine, softened
1/3 cup cream cheese or tofutti cream cheese
3 to 3 1/2 cups confectioners’ sugar
1/2 vanilla bean, seeded, or 1 teaspoon vanilla extract
1 tablespoon soymilk
6 ounces white chocolate, melted
12 fresh raspberries
Directions
Preheat oven to 350ËšF.
In a large bowl, sift together flour, baking powder, baking soda, and salt. Add sugar and brown sugar and mix. Slowly mix together melted chocolate and oil. Whisk together soy milk, coconut milk, lemon zest, and vanilla. Make a well in the center of the dry ingredients and pour in the wet ingredients. Mix until relatively smooth. Fill cupcake liners with a scant 1/4 cup of batter (should be just under 2/3 of the way full – my cupcakes overflowed, so err on the under-filled side here). Bake for 20-25 minutes or until golden, and toothpick inserted in the center comes out clean. Transfer to cooling rack and allow to cool completely.
To make filling, combine frozen raspberries with water, sugar, and lemon juice in a small saucepan. Cook over medium heat until raspberries begin to break down. Add 1 tablespoon cornstarch mixture and bring to a simmer. Remove from heat, and strain mixture through a fine mesh sieve, pressing as much through as possible. Return strained mixture to heat once again. Add another tablespoon of cornstarch mixture, and bring to a simmer. If mixture still seems thin, add more cornstarch as necessary. It will thicken more upon cooling. Remove from heat and allow to cool completely.
Cut out small cones from tops of cupcakes (holes should be approximately 1/2″ across and 1/2″ deep), saving removed cake. Fill holes with raspberry filling, and replace cake on top.
To make frosting, beat butter or margarine and cream cheese until fluffy. Slowly add confectioner’s sugar, 1/2 cup at a time, until creamy. Melt white chocolate as before, and mix in vanilla seeds or extract. Add to frosting and mix well. Add extract and soy milk, and beat until fluffy (add more sugar and/or soymilk if you need it, until you get the right texture). Generously pipe or spread onto filled cupcakes. Top each cupcake with a single fresh raspberry.
**Hannah's Hints**
* This is a crazy involved recipe. I NEED a sieve because a tea strainer just doesn't cut it. Yikes. But it does work...eventually...
* The frosting recipe is super duper sweet, so perhaps a little less than usual. Still yummy and white chocolate-y!
* Please top these with fresh raspberries...the bite with the raspberry, frosting, filling, and cake is the BEST!
* Also, instead of the coconut milk we just used all soy milk...it's nice and vegan too!
Sunday, April 4, 2010
Week 13. "First Friday" Key Lime Cupcakes
This week I had the immense good fortune to be asked by Laurie, from Annie Laurie's to make cupcakes for their First Friday open house. I wanted to make something unique and Spring-y, to celebrate the beautiful weather of late and to show any potential customers *fingers crossed* that I don't just make your typical chocolate or vanilla cupcakes! It was really exciting to get paid for doing something I love!
"First Friday" Key Lime Cupcakes
CUPCAKES
1 cup all purpose flour
3/4 cup self-rising flour
1/2 cup (1 stick) unsalted butter, room temperature
1 1/4 cup sugar
2 large eggs
2 1/2 tablespoons fresh lime juice
1 tablespoon finely grated lime peel
1/4 teaspoon neon-green food coloring
3/4 cup buttermilk
FROSTING
1 8-ounce package cream cheese, room temperature
1 1/2 cups powdered sugar
1/2 cup (1 stick) unsalted butter, room temperature
1 tablespoon finely grated lime peel
1/2 teaspoon vanilla extract
CUPCAKES
Preheat oven to 350°F. Line standard muffin pan with 12 paper liners. Whisk both flours in medium bowl. Beat butter in large bowl until smooth. Add sugar; beat to blend. Beat in eggs 1 at a time, then next 3 ingredients (batter may look curdled). Beat in flour mixture in 3 additions alternately with buttermilk in 2 additions. Spoon scant 1/3 cup batter into each liner.
Bake cupcakes until tester inserted into center comes out clean, 20 to 25 minutes. Cool 10 minutes. Remove from pan; cool.
FROSTING
Beat all ingredients in medium bowl until smooth. Spread over cupcakes.
**Hannah's Hints**
* I omitted the green food coloring because you really couldn't see it after you mixed in all the flour unless you put a TON in.
* These are so interesting...for some reason after I took them out of the oven, they shrank away from the cupcake papers. They looked more like cute little tea cakes!
* The icing for this one recipe covered about 64 cupcakes, unless you really pile it on!
* I loooooooove my new zester! It makes life so much easier!
AND
I made cookies especially for Caleb because he was nice enough to video me and because I love him!
I'll post the recipe soon!
And wonderful boy bought be a gooooorgeous hyacinth (we named the flower stalks after the fairies from Sleeping Beauty!) and we made homemade pizzas!!
And finally, check out the wonderfully macabre art of my good friend, Lynn Graznak Saults!
images from www.surrealmacabreart.com
Subscribe to:
Posts (Atom)